
H1: [6 Ways] How to Recover Previous Version of Word Document on Mac
You’re working on a Word document when your Mac crashes or Microsoft Word decides to terminate itself abruptly. The onset of anxiety is eminent when you become aware that your work has not been saved. This means hours of work, potentially lost. But, can you recover previous version of Word document on Mac, and if yes how? We’ll answer these queries in this guide, so you can resume your workflow.
Part 1: Can You Restore Previous Versions in Word on Mac?
Yes. You can recover earlier version of Word document on Mac through a backup feature like File History, AutoSave, or Time Machine. You can also retrieve a previous version of a file from the Temp or AutoRecovery folder. However, if you can’t locate your document in these folders or haven’t enabled a backup use a professional Mac recovery tool to reclaim the old file.
Part 2: How to Restore Previous Versions in Word on Mac?
Following are 6 ways to recover old version of Word document on Mac if your file has been overwritten. Pick a method based on your situation:
Option A: Use the Browse File History Feature
When activated, the built-in File History feature in MS Word allows you to recover previous version of Word document Mac. It can save various versions of a file based on the modifications you’ve made to it over time. So, you can open the document, review its past versions, and restore it to any version by overwriting the current file. To do so:
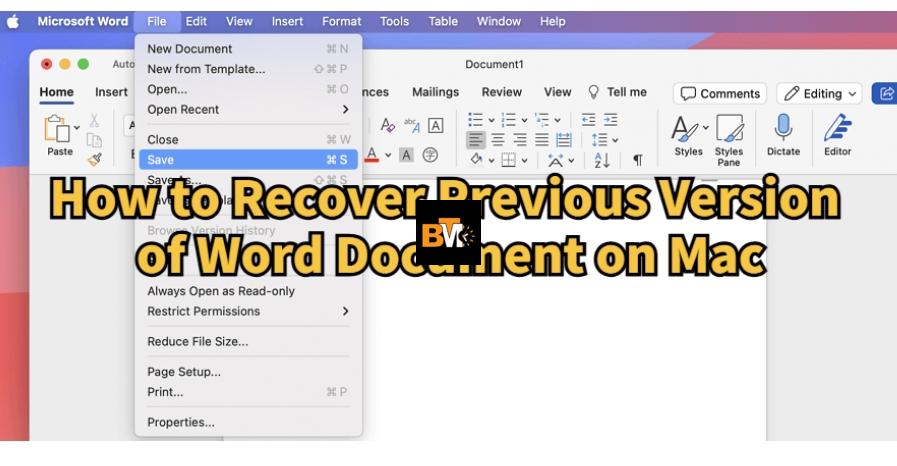
Step 1: Open the Word document that you wish to restore to an earlier version on your Mac.
Step 2: Head to “File.” Then, choose “Browse Version History
Step 3: Select a version based on the time stamp to restore, from the listed versions on the left.
Option B: Employ a Professional Recovery Tool
In a situation where you haven’t enabled any backup feature to recover previous version of Word document on Mac, use a professional Mac data recovery app. 4DDiG Mac Data Recovery is a tool that can retrieve previous versions of files whether you erased them by mistake, they got corrupted or you formatted them. Here are its key features at a glance:
- This tool can reclaim files from MS Word, and other Microsoft programs like Excel, PowerPoint, etc, with a high recovery rate.
- It offers a free examination of recovered Word files by their path and type, and you can also pick a specific file format to scan.
- Intuitive user interface and fast scanning speed.
- This recovery software is compatible with the latest Apple chipsets and macOS 15.
Check out the steps beneath to recover an older version of a Word document with this tool:
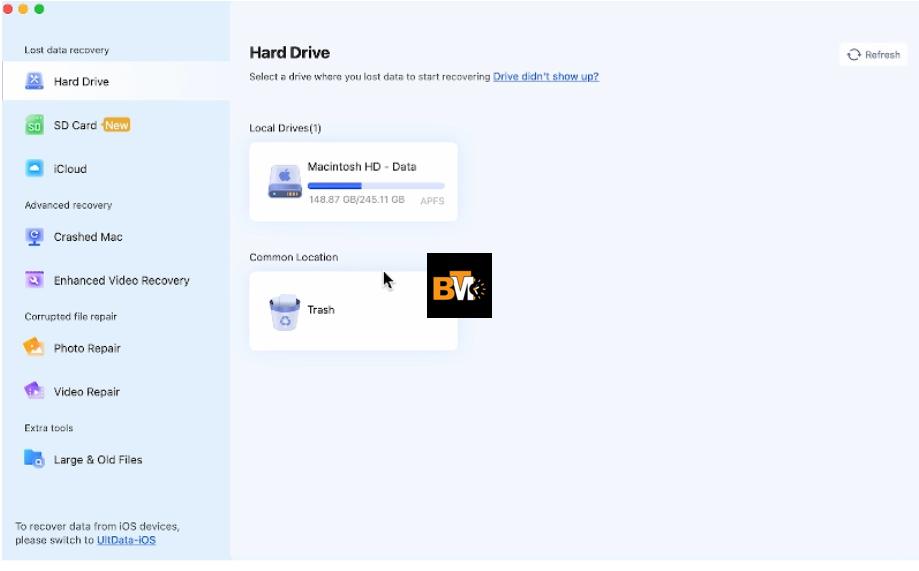
Step 1: Download and install the Mac data recovery tool on your computer. Then, choose your storage device where you want to reclaim the earlier version of a Word document.
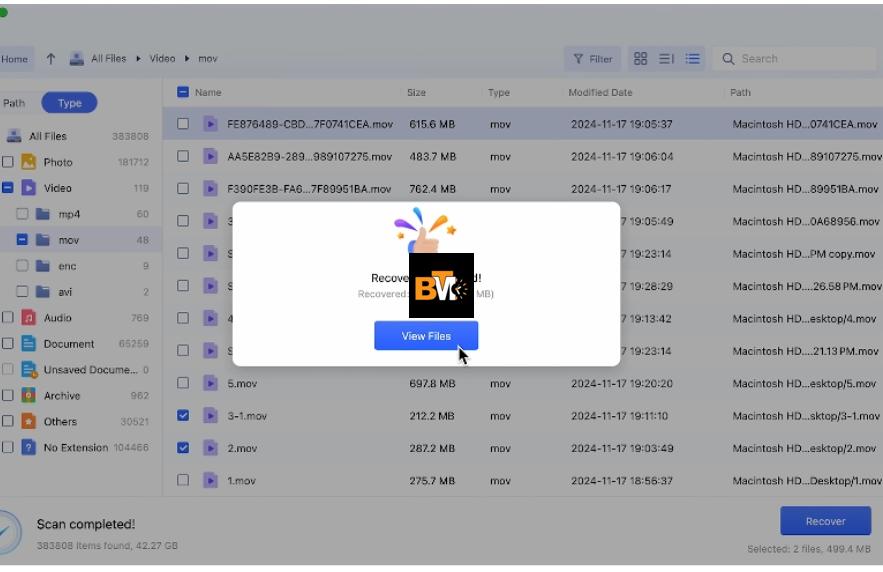
Step 2: Pick only “Document” file types to scan. You can stop the scan once the older version of your Word document has been recovered and examine it.
Step 3: Hit “Recover” to export the reclaimed version of the Word file to a secure place on your computer or cloud drive.
Option C: Check the AutoRecovery Folder
In case MS Word closed suddenly and your file was unsaved, you can look for its previous version in the AutoRecovery folder. When enabled the AutoRecovery feature will save your unsaved files automatically. So, later on, you can visit the folder to manually recover earlier version of Word document on Mac. To do so:
Step 1: Head to “Go” on the Mac menu. Then, tap “Go to Folder.”
Step 2: In the pop-up box, type the following. Hit “Enter” afterward:
- ~/Library/Containers/com.Microsoft.Word/Data/Library/Preferences/AutoRecovery
Step 3: The AutoRecovery folder will open. Find the previous version of Word document on Mac and reclaim it from this folder.
Option D: Check the Temp Folder
Mac has a hidden TemporaryItems folder that stores unsaved Word documents as a cache. If your MS Word or computer closes suddenly, you can recover old version of Word document on Mac from this folder. However, the TemporaryItems folder only retains files for a short time and to access it, you’ll need to use the Terminal. Here’s how to execute Terminal to open this folder:
Step 1: Press “Space + Command” keys. This will open Spotlight. Look for “Terminal.” Then, execute it.
Step 2: Type the following command. Hit “Enter” afterward:
- $TMPDIR
Step 3: Open the “TemporaryItems” folder. Next, look for the previous version of your Word file. It will be displayed with the “.tmp” extension.
Step 4: Once you find it, replace the “.tmp” extension with “.doc” or “.docx” so you can open it in MS Word.
Option E: Utilize a Time Machine Backup
Time Machine is a built-in Mac utility that saves a copy of your Mac files automatically on an external device. The first backup saves all the data on your computer. After that, it saves hourly, daily, and weekly backups from where you can recover earlier version of Word document on Mac. Here’s how to do that:
Step 1: Plug in your external disk containing the Time Machine backup of your Word file. Then, head to “Go” on the Mac menu.
Step 2: Next, pick “Applications.” Locate and execute “Time Machine.” After this, look through the timeline to pick an older version of your Word file. Hit “Restore.”
Option F: Use the AutoSave Feature
You can also recover old version of Word document on Mac if you’re using Microsoft 365 tools, and have enabled the AutoSave feature. When activated it can back up your Word document in real time. However, this function is only available if your Word file was saved on OneDrive or SharePoint Online. Follow the instructions beneath to reclaim an earlier version of your document with the AutoSave feature:
Step 1: Head to “https://onedrive.com/.” Then, input your credentials. This will log you into your Microsoft 365 account.
Step 2: Head to the “Recent” folder. Locate an old version of your MS Word document. Next, hit “Download.”
Bonus Tip: How to Enable Auto Backup In Word on Mac
If you haven’t enabled the Auto Backup feature in Word on Mac, it is time you do so. This is to avoid coming across a situation like losing Word files due to a crashed system or unexpected shutdown of the MS Word app. With the Auto Backup activated, you can recover the files even if they were unsaved. Here’s how you can turn on this function in Word on Mac:
Step 1: Open Microsoft Word on your Mac. Next, click “Word” in the top menu bar and select “Preferences.”
Step 2: Then, tap “Save.” Check the box next to Save AutoRecover info every X minutes.
Step 3: Dismiss the Preferences window—your changes are automatically saved.
Step 4: You can find the backup Word files in the following path:
~/Library/Containers/com.microsoft.Word/Data/Library/Preferences/AutoRecovery/
Conclusion
We’ve shared 6 options to recover previous version of Word document on Mac with File History, AutoRecovery, Time Machine, temporary files, and AutoSave for Microsoft 365 users. But if you haven’t enabled any of these auto-backup features, a data recovery tool can help. We recommend 4DDiG Mac Data Recovery for its ease of use and high success rate in retrieving lost files from crashes, deletions, and formatting.