When developing an iOS app using SwiftUI, TabView plays a crucial role in managing app navigation. However, developers often find themselves wondering how to set the focus on a specific tab—particularly the second tab—right after the app launches. In this article, we’ll cover everything you need to know about focusing on the second tab in a SwiftUI TabView. Whether you’re a beginner or an experienced developer, this guide will simplify the process and ensure you achieve your goal seamlessly.
What is a TabView in SwiftUI?
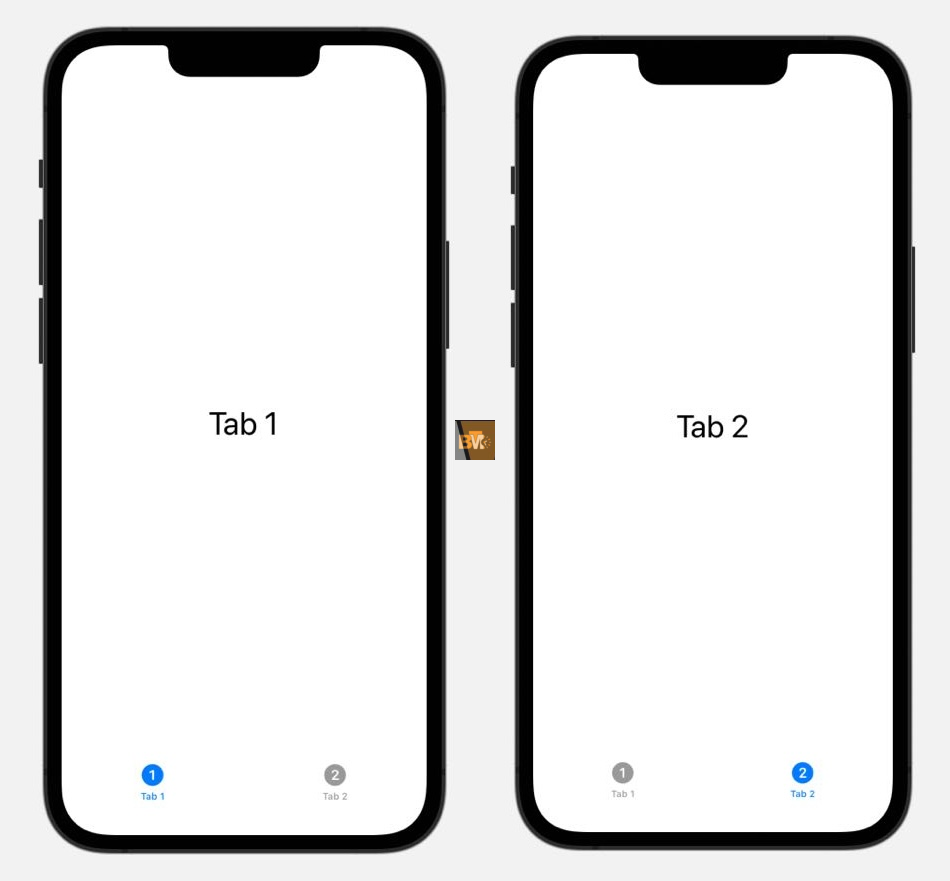
A TabView is a SwiftUI container that allows you to organize your app’s content into multiple sections, each represented by a tab. These tabs are displayed at the bottom of the screen, making it easy for users to navigate through your app. TabView is widely used in iOS apps because it provides an intuitive way to switch between different views.
For instance, if you’re building an app with features like a home page, settings, and a profile page, you can use TabView to create three tabs. Each tab represents one of these sections, and users can switch between them effortlessly by tapping on the corresponding tab.
TabView is not just user-friendly but also developer-friendly. It’s highly customizable, letting you change the icons, labels, and even behaviors for each tab. By default, the first tab is selected when the app starts, but in some cases, you may want to focus on the second tab instead. Let’s explore how to achieve that.
How to Set the Second Tab as Default
By default, SwiftUI’s TabView initializes with the first tab selected. However, with a few lines of code, you can modify this behavior to make the second tab the default focus when your app launches. This involves working with state variables and binding them to the TabView’s selection property.
Here’s the process in simple terms:
- Create a @State variable that keeps track of the currently selected tab.
- Assign the second tab’s identifier to this variable when the app launches.
- Bind this variable to the selection property of the TabView.
With these steps, you can control which tab is selected by default. This approach is particularly useful if you want to guide users to a specific section of your app right after it opens.
Why Focus on the Second Tab?
Focusing on the second tab as the default option can have several advantages depending on your app’s design and functionality. Here’s why you might consider this:
- Highlight Key Features: If the second tab represents a key feature of the primary functionality of your app, setting it as the default ensures users see it first.
- User Experience Optimization: Guiding users to the most relevant content improves the overall user experience and reduces friction in-app navigation.
- Customization for Specific Scenarios: Certain apps may have scenarios where it makes more sense to skip the first tab and display the second tab immediately. For example, if the first tab is a splash screen or onboarding content, focusing on the second tab streamlines the user’s journey.
Let’s dive deeper into whether you need advanced SwiftUI skills to implement this feature.
Do I Need Advanced SwiftUI Skills?
Not at all! You don’t need advanced SwiftUI knowledge to make the second tab the default focus. The process is straightforward and can be accomplished with basic SwiftUI concepts like state variables and bindings. If you’re familiar with the basics of SwiftUI, you’ll find this task manageable and even fun to implement.
Can I Use This for Other Tabs?
Absolutely! While this article focuses on setting the second tab as the default, you can apply the same technique to any tab in your TabView. Whether it’s the third, fourth, or even the last tab, the process remains the same. Simply adjust the identifier for the tab you want to set as the default.
Is This Feature Available for iOS Only?
Yes, the TabView feature in SwiftUI is specifically designed for iOS, iPadOS, and macOS apps. If you’re building a cross-platform app, you’ll need to consider alternative approaches for other platforms like Android. However, SwiftUI’s TabView works seamlessly across Apple’s ecosystem, making it a powerful tool for iOS developers.
Step-by-Step Guide to Focus on the Second Tab
Here’s a step-by-step guide to help you set the focus on the second tab in your SwiftUI TabView:
- Define a State Variable: Create a @State variable to keep track of the selected tab.
- Assign a Default Value: Set the default value of the state variable to the identifier of the second tab.
- Bind the State Variable: Bind this state variable to the selection property of the TabView.
- Add Identifiers to Tabs: Use the tag modifier to assign unique identifiers to each tab in your TabView.
This approach ensures that the second tab is selected automatically when the app launches. In the next section, we’ll provide an example code to illustrate these steps.
Example Code for Second Tab Focus
Here’s a simple example of how to set the focus on the second tab in a SwiftUI TabView:
Explanation of the Code

- The @State variable selected keeps track of the currently active tab.
- TabView’s selection property is bound to be selected.
- Each tab is assigned a unique tag to identify it. By setting selected to 2, the second tab is selected by default.
Common Mistakes to Avoid
When implementing this feature, developers often encounter a few common pitfalls. Here’s how to avoid them:
- Forgetting to Bind the State Variable: Without binding the state variable to the TabView’s selection property, your app won’t respond to changes in the selected tab.
- Duplicate Tags: Each tab must have a unique tag. Reusing the same tag for multiple tabs can cause unexpected behavior.
- Testing on Simulator Only: Always test your app on a real device to ensure the TabView behaves as expected across different screen sizes and scenarios.
Tips for Beginners
- Start with simple examples: Begin by creating a basic TabView with two or three tabs before attempting more complex configurations.
- Test your app on a real device: The behavior of SwiftUI views can sometimes differ between the Simulator and actual devices. Testing on a real device ensures your app functions correctly in real-world scenarios.
Do I Need Advanced SwiftUI Skills?
As mentioned earlier, no advanced skills are required. If you’re comfortable with basic SwiftUI concepts like state management and bindings, you’ll find this implementation straightforward. Even if you’re a beginner, following the steps in this article will help you achieve the desired result without any trouble.
The Bottom Line
Setting the focus on the second tab in a SwiftUI TabView is a simple yet powerful way to improve your app’s user experience. By following the steps outlined in this guide, you can ensure that users are directed to the most relevant content when they open your app. Whether you’re highlighting a key feature or optimizing navigation, this technique is a valuable addition to your SwiftUI toolkit.
With a solid understanding of state variables, bindings, and TabView customization, you’re well-equipped to implement this feature in your app. So, go ahead and give it a try—you’ll be surprised at how easy and effective it is!