
Creating beautiful, functional cutting boards is a satisfying woodworking project. But to take your boards to the next level, adding handles is key. A cutting board handle jig can make this process simple, precise, and repeatable. In this detailed guide, we’ll walk you through everything you need to know about cutting board handle jigs, why they’re essential, and how to make one yourself. Whether you’re a beginner or an experienced woodworker, this article will help you create flawless cutting board handles every time.
What is a Cutting Board Handle Jig?
A cutting board handle jig is a woodworking tool or template designed to help you carve out or route perfect, uniform handles on cutting boards. It acts as a guide, ensuring your handles are consistent in size, shape, and placement across multiple boards. Without a jig, cutting handles can be tricky, as even small errors in alignment or measurement can affect the final look and usability of your cutting board.
Typically, handle jigs are used with a router or a drill to carve out smooth, ergonomic handles that are easy to grip. These jigs are either pre-made and purchased from a woodworking store or custom-built by hobbyists to suit their specific needs.
Why Do You Need a Handle Jig for Cutting Boards?
There are several reasons why a cutting board handle jig is essential for woodworking projects:
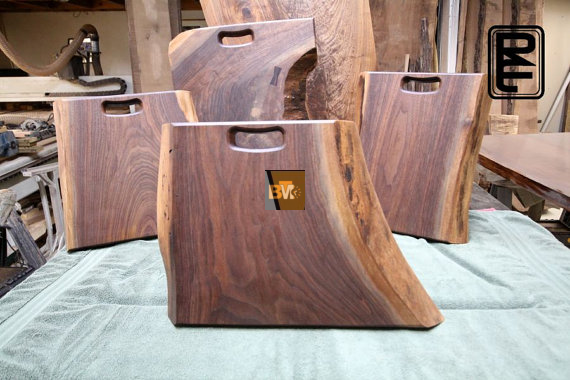
- Precision: A handle jig ensures that your handles are symmetrical, well-placed, and uniform across multiple boards. If you’re selling or gifting cutting boards, this consistency adds a professional touch.
- Efficiency: With a handle jig, you can streamline your workflow. Instead of measuring and marking each cutting board individually, you can quickly replicate the same handle design with minimal effort.
- Safety: Using a handle jig reduces the risk of making mistakes when using power tools like routers. The jig holds your cutting board in place and guides your tools for accurate results.
- Customization: You can design a handle jig to fit specific cutting board sizes or create unique handle shapes, giving you creative control over your projects.
How to Make Your Own Cutting Board Handle Jig
Building a cutting board handle jig is a straightforward DIY project that requires only basic tools and materials. Here’s a step-by-step guide to help you create your own jig.
Materials You’ll Need
To make your cutting board handle jig, you’ll need the following items:
- Plywood or MDF board (at least 1/2 inch thick) – This will serve as the base for your jig.
- Clamps – To hold your cutting board securely while routing the handle.
- Measuring tape – For precise measurements.
- Pencil – To mark your measurements and layout.
- Router or drill – For carving the handle.
- Template guide bushing – To guide the router along your jig.
- Jigsaw or hole saw – To cut the handle slot.
- Sandpaper – To smooth the edges of the jig.
Optional: You may also need wood glue and screws if you’re adding supports or reinforcement to the jig.
Measuring and Cutting
- Determine the Handle Placement
- Decide where you want the handles to be on your cutting boards. Measure the dimensions of your board and mark the handle’s location using a pencil. Typically, handles are centered along the board’s edges for symmetry.
- Design the Jig
- On your plywood or MDF board, outline the shape and size of the handle slot. This slot will serve as the template for routing or drilling the handle into your cutting board. Ensure the slot matches the desired size of your handle and leaves enough space for your router’s guide bushing.
- Cut the Slot
- Use a jigsaw or hole saw to cut out the handle slot in your jig. If the handle design includes curves, take your time to ensure the cuts are smooth. Sand the edges of the slot to remove any roughness and ensure the router glides smoothly.
Assembling the Jig
- Attach Supports
- If necessary, add supports to the jig to keep your cutting board in place during use. You can glue or screw small wooden blocks to the jig, ensuring the board doesn’t move while you’re routing the handle.
- Test the Fit
- Place a cutting board into the jig and check that the handle slot aligns with your desired handle placement. Make adjustments if needed.
- Clamp Securely
- When you’re ready to use the jig, clamp your cutting board to the jig securely. This ensures that the board won’t shift during the routing process.
Tips for Using a Cutting Board Handle Jig
- Practice First: Before routing a handle into your actual cutting board, practice on scrap wood. This helps you refine your technique and ensures the jig is working as intended.
- Use the Right Router Bit: For smooth and ergonomic handles, use a round over or cove router bit. These bits create a comfortable grip for the handles.
- Go Slow: Take your time while routing or drilling. Moving too quickly can cause the router to slip, resulting in uneven cuts.
- Secure Your Tools: Double-check that your router or drill is properly secured to avoid accidents.
Common Mistakes to Avoid with Handle Jigs
- Inaccurate Measurements: Failing to measure correctly can result in misaligned or uneven handles. Always double-check your measurements before cutting.
- Using the Wrong Material: A flimsy or poorly constructed jig can shift during use, leading to errors. Use sturdy materials like plywood or MDF for your jig.
- Skipping Sanding: Rough edges on the jig or the handle slot can damage your cutting board or affect the router’s movement. Always sand your jig for a smooth finish.
- Not Securing the Board: If the cutting board isn’t clamped tightly to the jig, it may move during routing, resulting in uneven handles.
Top Benefits of a Cutting Board Handle Jig
Where to Buy or Build a Cutting Board Handle Jig
While you can purchase pre-made cutting board handle jigs from woodworking supply stores or online retailers like Amazon, building your own jig offers greater flexibility. A DIY jig can be customized to suit the exact size and design of your cutting boards, saving you money and giving you full creative control.
Create Perfect Handles Every Time!
With a well-made jig, you can create professional-quality cutting board handles that are consistent, attractive, and functional. Whether you’re making boards for personal use or selling them as part of a woodworking business, a handle jig ensures flawless results.
Using the Wrong Wood
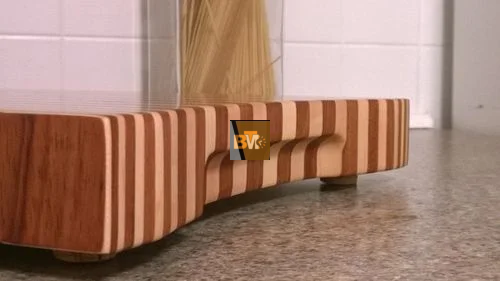
When making cutting boards, always choose hardwoods like maple, walnut, or cherry. These woods are durable, food-safe, and less likely to crack or warp over time. Avoid softwoods, as they can splinter when routing handles.
Skipping the Measurements
Measurement errors are one of the most common mistakes when making cutting boards and handling jigs. Always use a measuring tape or ruler to carefully mark your cutting board and jig. Double-check all dimensions before cutting to avoid wasting materials or ruining your project.
The Bottom Line
A cutting board handle jig is an indispensable tool for anyone who wants to create high-quality cutting boards. By following this guide, you can make your own jig and enjoy precise, repeatable results with every project. Whether you’re a DIY enthusiast or a seasoned woodworker, investing time into building a handle jig will save you time and effort in the long run.
So, grab your tools, gather your materials, and start crafting the perfect cutting board handle jig today. With the right approach and a little practice, you’ll soon be creating stunning cutting boards with handles that look and feel amazing!