If you’re looking for a rewarding DIY project that’s both practical and beautiful, making an end-grain cutting board is a fantastic choice. Not only are these cutting boards durable and kind to your knives, but they also showcase stunning wood grain patterns. This detailed guide will walk you through the entire process, from understanding what makes end-grain cutting boards special to crafting your own masterpiece at home. Whether you’re a woodworking novice or a seasoned DIY enthusiast, this step-by-step tutorial will help you create a cutting board you can be proud of.
What Is an End Grain Cutting Board?
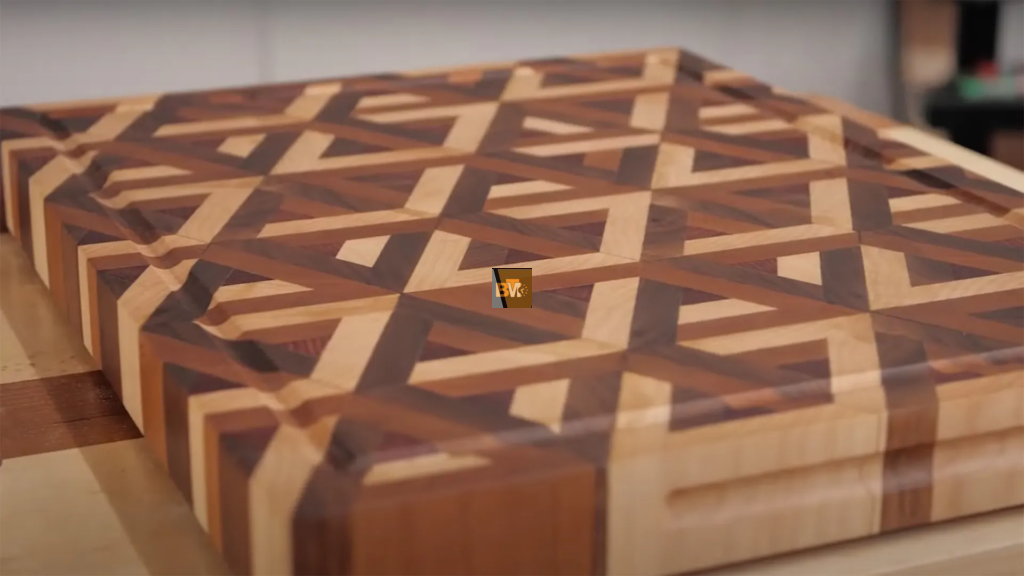
An end grain cutting board is a type of cutting board where the wood grain runs vertically rather than horizontally. This means the surface of the board is made from the end fibers of the wood. When you look at an end grain cutting board, you’re essentially seeing the “top” of the wood grain, which creates a unique checkerboard or mosaic-like appearance.
Unlike traditional edge grain or face grain boards, where the grain runs along the surface, end grain boards are prized for their self-healing properties and ability to handle heavy knife use. Their construction not only makes them beautiful but also incredibly functional.
Why Choose End Grain Over Other Cutting Boards?
There are several reasons why end grain cutting boards are considered superior to other types:
- Knife-Friendly Surface: When you chop or slice on an end grain board, your knife blade slides between the wood fibers rather than cutting through them. This helps preserve the sharpness of your knife over time.
- Durability: End grain boards can withstand heavy use without showing significant wear and tear. They’re less prone to scratching and gouging compared to edge or face grain boards.
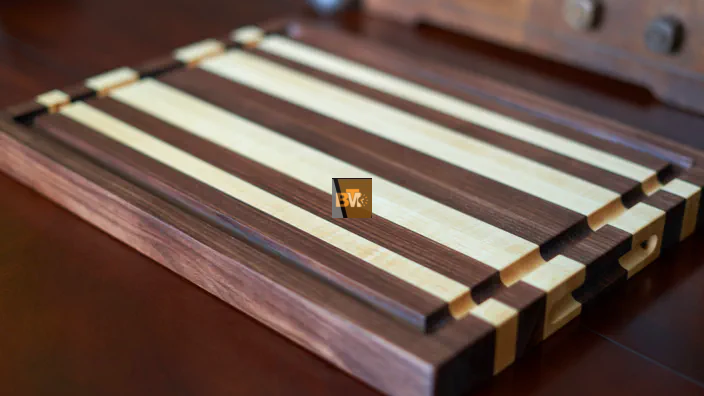
- Aesthetic Appeal: The intricate patterns created by arranging wood blocks end-to-end are visually stunning. These boards often become a statement piece in any kitchen.
- Self-Healing Properties: The wood fibers in an end grain cutting board naturally close up after being cut, which minimizes visible damage and helps maintain the board’s appearance over time.
What Makes End Grain Boards So Durable?
The secret behind the durability of end-grain cutting boards lies in their construction. Unlike other boards, where the knife strikes across the grain, end grain boards are built with the fibers facing up. This allows the fibers to “give” slightly under pressure, absorbing the force of the knife rather than resisting it. This not only reduces wear on the board but also minimizes stress on your knife blade.
Additionally, the arrangement of small wooden blocks in an end grain board distributes force more evenly, which makes the board less likely to crack or warp over time. With proper care, an end grain cutting board can last for decades.
How End Grain Helps Keep Your Knife Sharp
One of the biggest advantages of an end grain cutting board is its ability to keep your knives sharp for longer. When you chop on an end grain board, the knife edge pushes into the wood fibers, which then close back up after the knife is removed. This reduces the impact on the knife blade and minimizes dulling, saving you time and money on sharpening.
Tools and Materials You’ll Need
Before you dive into making your end grain cutting board, gather all the necessary tools and materials. Having the right equipment on hand will make the process smoother and more enjoyable.
Essential Tools for Making a Cutting Board:
- Table Saw or Miter Saw: This is used to cut your wood pieces to the desired size.
- Clamps: To hold the wood pieces together while the glue sets.
- Orbital Sander: This is used to smooth out the surface of the board.
- Planer (optional): To level the board after gluing.
- Router (optional): For adding rounded edges or decorative features.
- Measuring Tape: To ensure precise measurements.
- Carpenter’s Square: For accurate 90-degree cuts.
- Wood Glue: Ensure it’s food-safe and water-resistant.
- Sandpaper: Use a range of grits, from coarse (80-grit) to fine (220-grit).
Materials:
- Hardwood (e.g., maple, walnut, cherry, oak, etc.)
- Food-safe mineral oil or beeswax (for finishing)
Best Types of Wood for End Grain Boards
Not all wood types are suitable for cutting boards, especially end grain boards. You need to choose hardwoods that are durable, non-toxic, and dense enough to withstand repeated knife strikes. Here are some of the best options:
- Maple: One of the most popular choices, maple is durable, easy to work with, and has a subtle, neutral color that pairs well with other woods.
- Walnut: Known for its rich, dark tones, walnut adds a touch of elegance to any cutting board.
- Cherry: Cherry wood has a warm reddish hue and is slightly softer than maple or walnut, making it easier to work with.
- Beech: A durable and affordable hardwood with a light, uniform color.
- Oak: While beautiful, oak is slightly porous, so it requires extra care to ensure it doesn’t absorb moisture.
When selecting your wood, make sure it’s kiln-dried to prevent warping and splitting.
Safety Tips Before You Start
Before you begin crafting your end grain cutting board, keep these safety tips in mind:
- Wear Protective Gear: Always wear safety glasses, a dust mask, and ear protection when working with power tools.
- Work in a Ventilated Area: Sanding and cutting wood generates dust, so ensure your workspace is well-ventilated.
- Handle Tools with Care: Follow the manufacturer’s instructions for all tools and use clamps to hold pieces steady while cutting or sanding.
- Use Food-Safe Materials: Only use wood glue and finishes that are specifically labeled as food-safe.
Choose and Prepare Your Wood
The first step in making an end grain cutting board is choosing the right wood and preparing it for assembly. Here’s how:
How to Pick the Right Wood for the Job
When selecting your wood, consider combining different species to create a unique pattern. For example, pairing dark walnut with light maple or cherry can create a striking contrast. Aim for boards that are at least 1 inch thick and free of knots or cracks.
How to Cut and Sand Your Pieces
- Measure and Cut: Use a table saw or miter saw to cut your wood into equal-sized strips, approximately 1.5 inches wide and 12-18 inches long. Precision is key here, as uneven pieces will result in gaps during assembly.
- Sand the Edges: Sand the edges of each strip to remove any splinters or rough spots. This will help the glue bond more effectively.
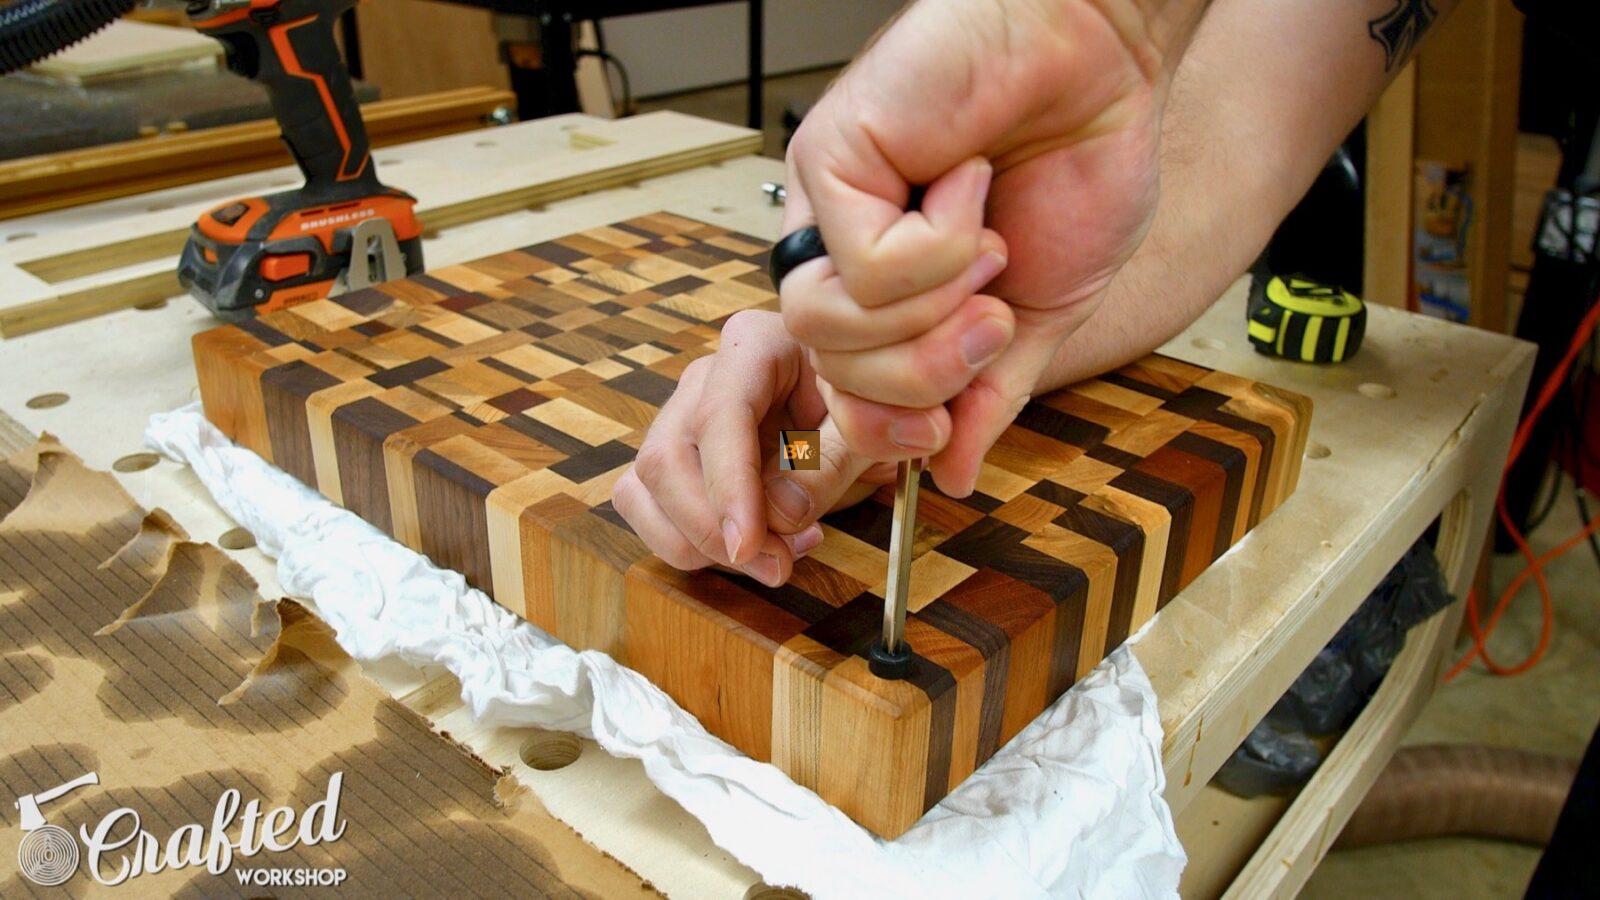
Arrange and Glue the Wood Pieces Together
- Create Your Pattern: Lay out the wood strips in your desired pattern, alternating colors and grain directions if desired.
- Apply Glue: Use food-safe wood glue to coat the edges of each strip. Press the strips together and secure them with clamps.
- Clamp and Let Dry: Tighten the clamps evenly to prevent warping. Allow the glue to dry for at least 24 hours.
The Best Glue to Use for Cutting Boards
When making an end grain cutting board, it’s essential to use glue that’s both food-safe and waterproof. Titebond III is a popular choice among woodworkers, as it meets FDA standards for indirect food contact and provides a strong, durable bond.
The Bottom Line
Crafting an end-grain cutting board is a rewarding project that combines artistry and functionality. With the right materials, tools, and a bit of patience, you can create a cutting board that will serve as a centerpiece in your kitchen for years to come. Not only are end grain boards beautiful and durable, but they’re also kinder to your knives, making them an excellent investment for any home cook or chef.
Take your time, follow each step carefully, and don’t be afraid to experiment with different wood species and patterns. Whether you’re making this cutting board for yourself or as a gift, the result will be a timeless piece that’s as practical as it is stunning. Happy woodworking!