Are you tired of propping up your cookbook with random objects in the kitchen? A cookbook stand can make cooking much easier by holding your book or tablet at the perfect angle for hands-free reference. What’s even better is creating one yourself! In this article, we’ll provide you with simple yet detailed cookbook stand plans that anyone can follow. Whether you’re a beginner at DIY or have some woodworking experience, you’ll love how easy and satisfying it is to build your own stand. Let’s dive into the process step by step.
What Is a Cookbook Stand?
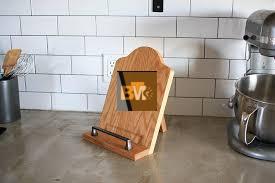
A cookbook stand is a tool designed to hold a cookbook, tablet, or recipe card in an upright position. It keeps your hands free from cooking and prevents your recipes from getting splattered with ingredients. Cookbook stands are often adjustable, allowing you to set the perfect angle for easy reading.
Most cookbook stands are compact and portable, making them ideal for small kitchens or for moving between your kitchen counter and dining table. They can be made from various materials, including wood, metal, plastic, or even acrylic. DIY cookbook stands often use wood for its versatility and durability, and building one allows you to customize the design to your personal style and kitchen theme.
Why Build Your Own Cookbook Stand?
There are several reasons why building your own cookbook stand is a great idea:
- Cost-Effective: Store-bought cookbook stands can be expensive, especially if they are made from high-quality materials like wood. Building your own stand allows you to save money and still enjoy a durable and stylish product.
- Customization: When you make your own stand, you have full control over the design. You can choose the size, material, and color and even add decorative elements to match your kitchen’s aesthetic.
- Fun DIY Project: Building a cookbook stand is a simple yet rewarding DIY project that doesn’t require advanced woodworking skills. It’s a great activity to try over a weekend and can even be done with kids or family members.
- Eco-Friendly: By using leftover wood or repurposing materials, you can create an environmentally friendly product that reduces waste.
Materials You Need for Your Cookbook Stand Plans
Before you get started, it’s important to gather all the necessary materials. Below is a breakdown of what you’ll need:
Tools You’ll Need
To build your cookbook stand, you’ll need basic tools that you may already have in your garage or toolbox:
- Measuring tape
- Saw (a handsaw or circular saw will work)
- Sandpaper (medium and fine grit)
- Drill and screwdriver
- Clamps (optional but helpful for holding pieces in place while working)
- Wood glue
- Paintbrush (if painting or staining)
Wood Options to Choose From
Wood is the most common material for DIY cookbook stands due to its durability and natural aesthetic. Some good options include:
- Pine: Affordable, lightweight, and easy to work with, making it great for beginners.
- Oak: A bit heavier but highly durable, offering a rustic and elegant finish.
- Plywood: A cost-effective option if you’re looking for simplicity and don’t mind a more basic look.
Other Supplies
- Screws or nails
- Wood stain, paint, or varnish (optional)
- Sanding block or electric sander
- Ruler or square for precise measurements
Step-by-Step Guide to Build a Cookbook Stand
Building a cookbook stand might seem challenging at first, but it’s actually a straightforward process. Follow these steps, and you’ll have your very own stand in no time:
- Measure and Cut the Wood
- Start by measuring and cutting your wood pieces. You’ll need three main parts:
- The base (to sit on the counter) is about 8-10 inches long and 6-8 inches wide.
- The back support (to hold the cookbook upright) is approximately 10-12 inches tall and the same width as the base.
- The ledge (to hold the book or tablet in place) is about 1 inch wide and the same length as the base.
- Sand the Edges
- Use sandpaper to smooth out the edges and surfaces of your wood pieces. This step ensures that your stand will look polished and safe to use without splinters.
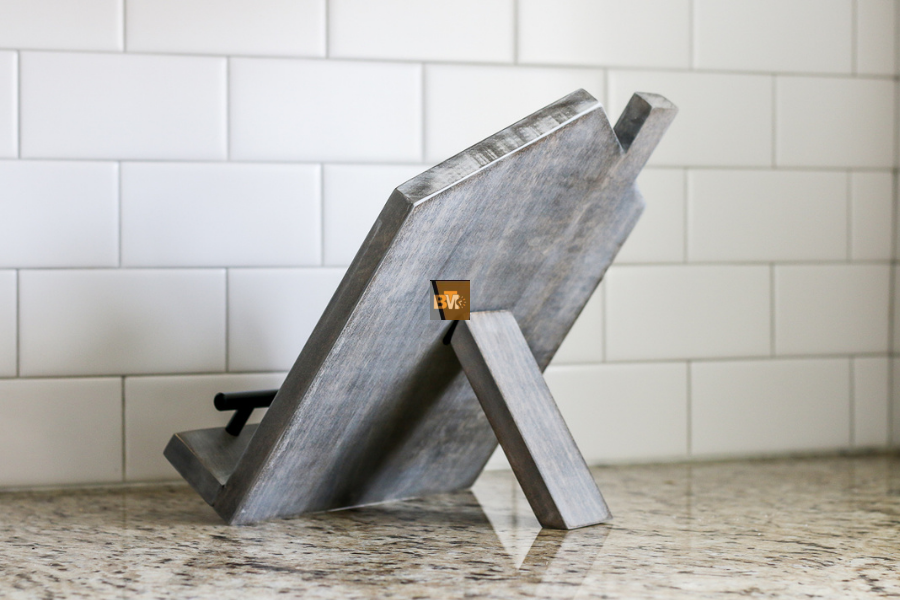
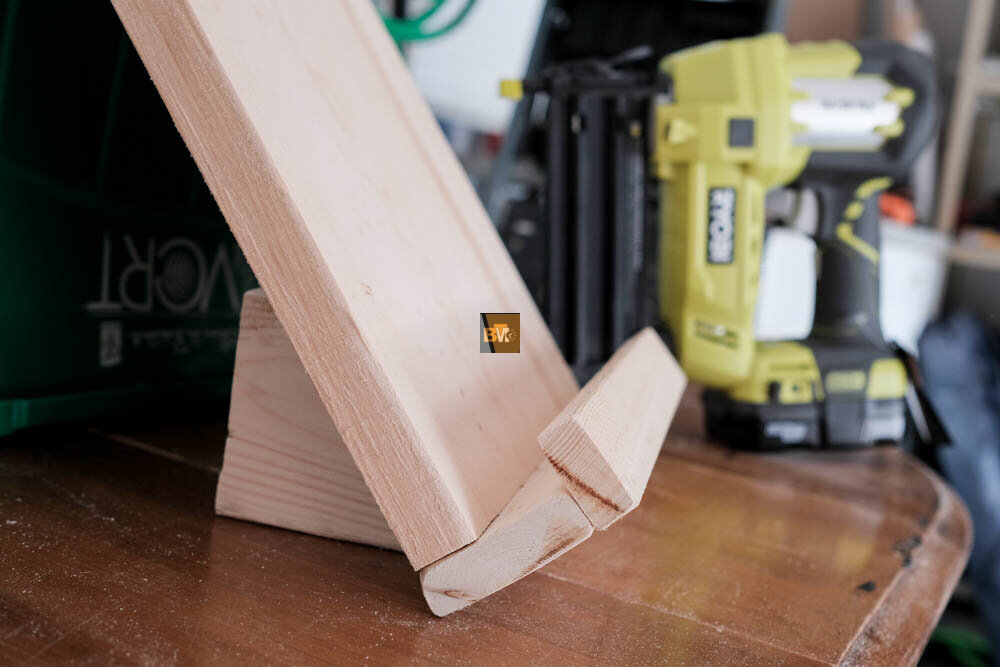
- Assemble the Stand
- Attach the back support to the base at a slight angle using screws and wood glue.
- Secure the ledge to the bottom front of the back support, ensuring it creates a small lip to hold your book.
- Use clamps to hold the pieces together as the glue dries for extra stability.
- Paint, Stain, or Decorate
- Once the stand is assembled, you can leave it with a natural wood finish or add a pop of color. Apply a wood stain for a rustic look, or paint it to match your kitchen’s color scheme. You can even personalize it with stencils or hand-painted designs.
- Test It Out
- Place a cookbook or tablet on your stand and make sure it sits securely. Adjust as needed for the perfect fit.
Decorating and Personalizing Your Stand
Making a cookbook stand is not just about functionality—it’s also an opportunity to add a unique touch to your kitchen. Here are some ideas for decorating and personalizing your stand:
- Use Stencils: Add quotes like “Bon Appétit” or “Cook with Love” to make it visually appealing.
- Add Handles: Attach small metal or leather handles for easy portability.
- Experiment with Colors: Paint it in bold colors or create a two-tone effect using contrasting shades.
- Apply Decoupage: Use decorative paper or fabric to give your stand a patterned finish.
- Seal It: For a glossy finish and to protect the wood from stains, apply a clear polyurethane coat.
How to Maintain Your Cookbook Stand
To ensure your cookbook stand lasts for years, proper maintenance is essential. Here’s how you can take care of it:
- Wipe it down regularly with a damp cloth to remove dust and spills.
- Avoid soaking the wood in water to prevent warping.
- If it starts to lose its shine, lightly sand the surface and apply a fresh coat of stain or varnish.
- Store it in a dry place when not in use to prevent moisture damage.
Cookbook Stand Plans for Beginners
If you’re new to woodworking, opt for simple designs with fewer pieces. A basic L-shaped stand with a flat base and back support is easy to make and requires minimal tools and skills.
Minimalist Cookbook Stand Idea
For a modern look, use a single piece of wood and carve a groove for the book or tablet to sit in. This design is sleek and compact, ideal for contemporary kitchens.
Rustic Wooden Cookbook Stand
For a farmhouse-style kitchen, go for a rustic design using reclaimed wood or distressed finishes. Add decorative touches like metal brackets or engravings to complete the look.
Why DIY Cookbook Stands Are Worth It
DIY cookbook stands offer a unique combination of functionality, creativity, and cost-effectiveness. They allow you to craft something useful while expressing your personal style. Plus, the process of building one is enjoyable and can be a fun project to do with friends or family. Instead of buying a mass-produced product, you’ll have a custom-made stand that adds character to your kitchen and helps you stay organized while cooking.
The Bottom Line
A DIY cookbook stand is a practical and stylish addition to any kitchen. By following these simple cookbook stand plans, you can create a stand that meets your needs and reflects your personality. Whether you’re a seasoned woodworker or just starting, this project is easy to tackle and incredibly rewarding. So gather your materials, roll up your sleeves, and start building your very own cookbook stand today!